|

 About the author: Paul Diamond Blow is a musician, spoken word artist, punk rock star, kung fu master, and part time Space Commander living in Seattle, Washington. Blow is a frequent contributor to the Seattle Sinner magazine and performs regularly in the Pacific Northwest rock club circuit. His book Tales From Outer Space is out now. More Paul Diamond Blow links: Paul Diamond Blow website Paul Diamond Blow music on CDbaby Paul Diamond Blow on iTunes 
Insult jokes and gags Related articles: How to Open an Indesign CS5 Document With Indesign CS3 Indesign CS5 Slow and Buggy? How to Speed it Up How to Merge Multiple Indesign Layouts into a Single File Indesign Tips: How to Apply Faux Bold and Italic Formatting to Text How to Convert Quark Xpress Documents to Indesign Paul Diamond Blow's "Huggy Talk" articles are copyright (c) 2010 Paul Diamond Blow Webmaster: Cornelius Zephyr privacy policy |
Coloring comic book line art in Photoshop page 6: finishing touches by Paul Diamond Blow The finishing touches: Now that you've got your comic panel all colored, the thing to do is zoom in on it and look for little bits and areas that you may have missed. You can simply use the brush tool to fill in any missed areas. On my ape comic panel I decided I wanted to change the color of the sky and the ground a bit, so I selected those layers and used the "Hue" control (Image / Adjust / Hue/saturation) to slightly change the hue of those areas. Now I'm happy!(See figure 9) 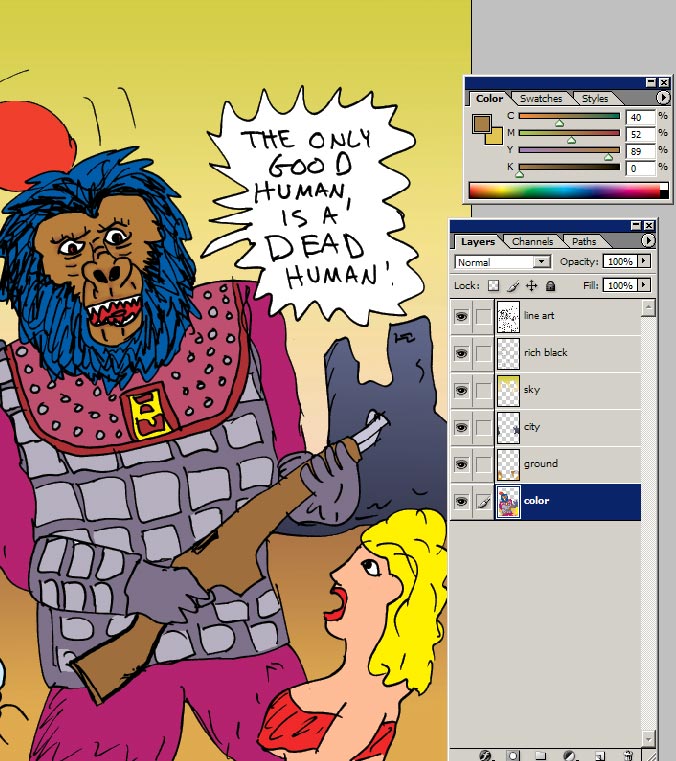
Figure 9: screenshot of completed file with Layers and Color palettes Now that the comic is all colored to my liking, I need a flattened color file. For comics going on the internet, you simply need to flatten your Photoshop file, downsample it to the desired web-ready size (all the jpegs I used in this guide are 600 pixels wide) and save as a jpeg. Make sure you've saved your original Photoshop file in case you need to go back and recolor anything. For print purposes, you need to turn off the line art layer, and then flatten the file. You will then have just the colors and the backing black color on one layer, (with no line art of course) and SAVE AS a tiff file. I always add "4C" to my flattened color files file names (this one I'm calling "Ape-4C.tif" and the original line art file is called "Ape-line.tiff". Then, in your page layout program place the color file first, then stack the line art file on top of it (and if using Indesign as your page layout, make sure the line art file overprints over the color file by checking "overprint" in the "attributes" palette.) AGAIN, make sure you've saved your Photoshop file in case you need to go back and recolor anything. Here is what my flattened Ape-4C.tif file looks like, ready for a page layout: 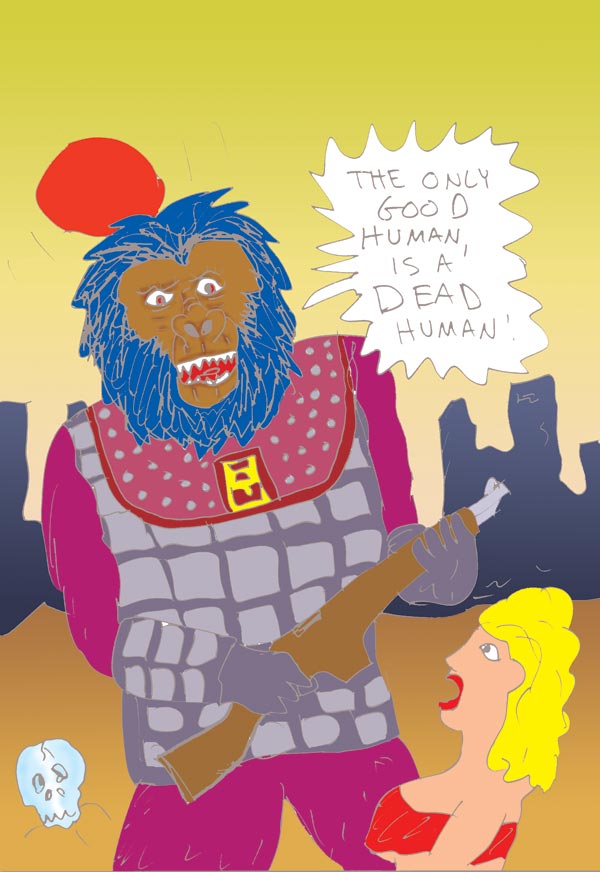 To see the final composite version of my colored ape, click to the next and final page of this tutorial! |